Greaves Lightning!

Go, Greaves Lightnin'
You're burnin' up the quarter mile
Greaves Lightnin', go Greaves Lightnin'...

I had John Travolta and "Greased Lightning" stuck in my head as I painted Bailey's greaves yesterday. I've started saying "greaves" now since I had to Google "metal shin guards" and realized they have a name-- I needed to brush up on my knowledge of armor! Here's a wonderful reference I found that may help you too:

I haven't painted on Bailey since June 8 and I've been in a serious creative funk. Now that I finally have my desk back and the construction repairs should be completed today, I powered-through my apathy. I downloaded a new audio book, prepped my brand new palette and refused to leave my chair until her greaves were painted. Here's where I left off:

I researched a few metal greaves online and found a few not-too-shiny green-gold references I could use. I also tried to imagine where the light would fall within the concept of zenithal lighting. While this diffused, overhead lighting angle doesn't work for everything (especially realistic lighting techniques like other-source-lighting and hyper-realistic NMM), I'm practicing painting NMM one step at a time starting with the basics. Here are some of the references I found online that helped me imagine how light would reflect off different metals-- so far, Bailey's metal matches Antique Brass the best!

Putting all of this information together, and adding an extra touch of high-contrast in the corners as a stylistic choice, she turned out pretty well considering my current skill level. I painted up her boots and bodice leathers. Now I can finally attach her arm and start painting her gloves and weapons-- last but not least will be her cloak!

...Greaves Lightning! Go! Go! Go! Go-go-go-go-go... 

My ReaperCon 2015 Classes

Hats off to the artists who teach classes at ReaperCon! One of the things I like the most about this convention is the opportunity to interact with the guest painters and sculptors who share their knowledge and take the extra time to give people requested feedback on their work. The Con-goers are encouraged to approach them in between their classes and ask questions or just watch them paint and/or sculpt. Most are only scheduled to teach one class per day so there's plenty of time to meet with them.  

I attended a maximum of eight classes at ReaperCon this year. I challenged myself with taking classes on topics that were "out of my comfort zone". I enjoy painting the figure as they're seen ideally-- with perfect smooth blending, beautiful face features (no scars, etc), and squeaky-clean line quality. What I have not applied is weathering techniques, advanced sculpted-from-scratch diorama basing, conversion sculpting of any kind or airbrush techniques. Those were the classes I focused on since I have so much more to learn!

My first class was Aaron Lovejoy's "Airbrush Basics" class. Aaron shared his knowledge about which airbrush models he enjoys using, how using airbrushes can speed up the initial painting process, and most importantly, how to keep your airbrush in good, clean working condition (fight the clog!). He gave a tutorial on a large Bones miniature that we passed around the room in between each step as he explained what he was achieving through layering airbrush colors. Prior to this class, I was not ready to invest in an airbrush (they can be very expensive!), but after Aaron's suggestion of starting with the cheapest model and just trying it out to see if you like it, I think I'll give it a shot! He recommended using an airbrush only in the beginning stages to block out interesting lighting effects before you pick up the paint brush for detailing "cause you still have to paint it. An airbrush is a tool but it shouldn't be the only tool". I definitely recommend this class if you're a beginner to airbrushing!

Weathering Techniques - Brice did a nice job teaching this class. Attempting to cover a myriad of weathering techniques (and fielding on-the-spot requests) is quite a challenge! Although the projector was set up to capture the tutorial details, it wasn't as successful as we'd hoped. While the cameras and TVs were a great idea, it was the first year they were used and were bound to run into a few quirks. We ended up passing around the miniature as Brice demonstrated different techniques-- we made it work! I've avoided weathering until now, and I notice it's significantly limited the variety of miniatures I can paint. For example, an orc wouldn't have a pristine shield with polished, expensive  metal, so I avoid painting them. As I struggled to paint my Troll Axer, I realized: there's no such thing as a pretty orc! The idea of taking a sponge or dry pigment and applying paint in random patterns to make a miniature purposely sloppy or messy makes me cringe. However, this is exactly why I wanted to take this class! Brice's competition entries are proof that weathering can be beautiful and add lots of personality and character to your miniatures (and his cloak freehand-- wow!)

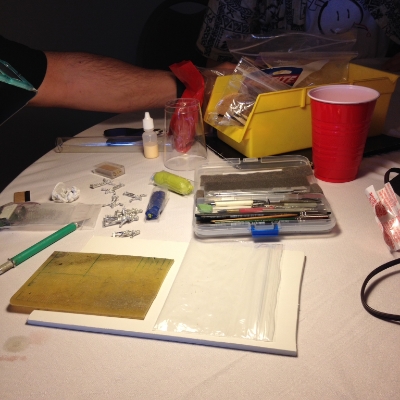
Crafting Terrain & Diorama Bases - Bob is awesome. I can't say that enough. He's a nice guy with an endless supply of funny stories and a wealth of knowledge that can only come from decades of industry experience. I took one of his classes at the Reaper Artist Conference back in October and knew going to this class, I'd learn quite a bit about what to use and, sometimes more importantly, what not to use, especially if you're clumsy like me (MEK glue - Methyl Ethyl Ketone. It's super-toxic!). We watched him put together a base and work his magic with styrofoam, styrene, cork and kitty litter (yes you read that right, unused litter of course!). It was really useful for me to see which order he puts things down in and how he applies it with his special mix of watery wood glue paste. And now I have a nice, long list of cheap-and-effective basing supplies to collect! I love the bases he sculpted out of styrene and plastic or metal cogs-- "They're easy!"

Intro to Competitive & Display Painting - My brain overloaded in this class-- it blew my mind (in a really, really good way!). Justin McCoy, founder and President of Secret Weapon Miniatures, spewed rapid-fire brilliance at us and covered an array of intermediate-to-advanced topics that turned everything I thought I knew upside-down and made me more passionate about this hobby (though I didn't think it possible). It was like taking a college-level art course (and not that "Art Appreciation for Non-Art Majors" bullsh*t). What'd we cover? Lots. Too much to list here. He covered everything from dissecting individual design elements of classical paintings, re-evaluating the color wheel concept we think we know, explaining what-makes-this-awesome examples from his slideshow and applying these concepts to our miniatures. Of the few classes I took that incorporated a TV and visual references, this one was executed the best. Justin's energy is contagious (think Philip DeFranco) and while the concepts are serious, his style of teaching is fun and casual. I could go on, but you'll just have to take the class yourself-- I hope he teaches it again next year! 

Painting Fur, Scales, & Feathers - Derek Schubert, you make this look easy. Studying miniature painting with Derek will show you a more intellectual side of painting. He's articulate, methodical in his painting, and he does a mean Monty Python impression! Oh and his painting is stupid-good. While some people take his classes thinking they'll be able to paint just like Derek after only 2 hours, we have to remember that he's been honing his talent for many years. Last year I was lucky enough to see the very first miniature he ever painted in person. He may have painted it when he was 11 years old, but it was encouraging to realize that it looked a lot like my very own first miniature. During this class we each painted a Reaper wolf mini (which he sculpted for Reaper) while he shared with us tips & tricks to painting more natural textures. Derek created a great piece awhile back titled "Liriel Unplugged" which included many well-painted critters gathering for a musical show under the forest canopy. He encouraged us to do our research and find various pictures of these animals to reference while we paint (he brought us each different wolf references to use during the class). He also demonstrated his techniques for feathers and scales and passed around previously-painted examples of his, including the Lamia I love so much!

"Sculpting Accessories for Conversions and Bases" with Bob Ridolfi. I'm new to sculpting, but I've been curious about conversions and adding more interesting custom elements to a base. Many times I've thought "if only I could fix ____" (maybe a funky hand that didn't quite translate from the original mold) or "I wish I could add a ___ detail on this base" when working with a mini. Of course, there's always the "Oh @$&# I just cut off part of her foot with the clippers, how can I salvage this?!" (trust me, it happened). One of the things I really like about Bob's classes is that he keeps it a fairly open format. He's so knowledgeable that he's able to say "Ok, what do you want to see? What do you want to know?" and you make requests and his hands go to work while he makes it on the spot, all the while talking about what he's doing and how. We passed around a few examples, including some "Captain Goodhair" fun when we wanted to see how he applied & sculpted hair. Love it!

Advanced Basing with Michael Proctor

Michael's work is a whimsical mix of color and texture. Many of his pieces incorporate natural elements-- dried leaves, mushrooms, interesting pieces of bark, and whatever else he finds interesting on his nature adventures (he lives in the beautiful state of Colorado). In this class, we passed around a few examples of his work that have won multiple awards at different conventions. One of my favorites is his "Toad King" GenCon entry. Michael explains how he creates bases to enhance the story and character of his miniature. While he's painting, he's inspired to craft a base specifically for the miniature, rather than building a base first and hoping it matches a future painted mini. 

NMM Special Effects with Derek Schubert

Derek used examples of his past work to explain how he approaches Non Metallic Metals-- in both traditional metals (i.e. a Paladin with bright silver armor) and fantasy metals (i.e. an elf in purple armor). The most important part of the process, he explained, "is visualizing how the light will interact with a reflective surface". He painted a sphere, cylinder, cone, and cube on a piece of paper to show us where the highlights, shadows, and other values would fall. My struggle with NMM is just that-- while I could study individual metals in different shapes, I never quite seem to know where to paint them when combined as interacting shapes in sculpted armor. Taking them more than one section at a time while paying attention to the overall light source is my new goal. I'll incorporate a shaded base coat technique so I don't get bogged down in details and look up only to realize I've skewed my intended light source. Derek's class helped me "see" details that I previously not been able to process. For example, I'd see an NMM sword and think, "That sword looks amazing!" Why? "Well it's just painted really well" But why? Now I'm able to identify that great NMM will contain color reflections in the surface, appropriately placed values with high contrast. The idea of "putting the darkest color next to the lightest color" is not a realistic, universal technique. This class really made me think!

I have a lot to work on in the next year. I practiced the techniques I learned in my 2014 classes last year over many months, and I'm happy to report that I've seen a lot of improvement in my own painting! I'll be creating more "Work in Progress" blog posts where I attempt to recreate some of these new techniques and I can't wait to see what I discover-- many of the lessons I've learned have been the result of trial-and-error, or as I like to call them, "happy accidents". I still have a long way to go, and I have plenty to keep me fueled in my continued miniature painting journey!

My Custom Pokey Tool

Everybody has a "Pokey Tool" for when the paint dropper bottle gets clogged. However, I don't. I have been using a wall push pin, which is not very effective. I've seen other pokey tools. In fact, many people at ReaperCon 2014 bought the metal skull pokey tool which had a very nice weight to it, but it just wasn't my style. I fully admit, I like cute things with big eyes like I'm five years old and it's ingrained into my very nature. (I'm half-Asian, or technically, "Pacific Islander" if you're filling out bubbles on a standardized grade school test). Regardless, I made up my mind long ago that my miniature painting pokey tool should be cute. And I have yet to find one after two years of painting, so I decided to make one myself using Sanrio's Chococat key holder and a pin. I started out using a pin from my old sewing kit and quickly realized the plastic ball on the top just wasn't going to work. The top warped the key cover and removing the ball wouldn't allow the super glue to adhere properly.

So I dug around in the depths of my old sewing supplies and found my magnetic pin cushion. I needed a T-pin to be able to glue the flat, wide surface area to the inside of the key holder. Unfortunately, finding a T-pin proved difficult-- kind of like finding a needle in a... well, needle stack. After suffering only one minor puncture wound, I found a T-pin and prepped my final supplies.

Once I applied super glue to the top part of the T-pin, I placed it inside and centered it, leaving about 25% of the T-pin inside the key cover. Then I held it together until the glue set, about 1 minute just to be safe. I love this picture-- it looks like Chococat is grimacing because I'm smooshing his face while the glue dries. Then I let it sit on my desk for about 5 minutes.

Next, it was time for the final test! I gathered a stubborn dropper bottle of paint and hoped for the best!

Success! Not only did the super glue hold well, the rubber key cover was incredibly comfortable to grip (unlike pins without handles) and it came away cleanly after poking through the top of the stubborn paint bottle. I'm very pleased. Not only do I have a cute & unique custom pokey tool, I can replace the chain and hang it on a peg by my desk for easy access. Brilliant. 

If you're thinking about making your own miniature painting pokey tool, consider using a T-pin and a key cover/key holder. Or create something similar out of clay, push T-pin into the center before baking in the the oven until set. Then, remove your new pokey tool and let it cool. As long as the clay isn't too thin around the T-pin, it should offer enough support as a pokey tool. Give it a try & share your results with me! Everyone needs a "Pokey Tool" and why not have yours reflect your own personal style?