Nerdy Thirty

My birthday was this past weekend and I have to say, it was one of the best ones yet! I turned thirty and rather than having a "Dirty Thirty" party complete with pub crawl and sloppy public intoxication, my better half threw me a "Nerdy Thirty" party, complete with a movie, card games, and video games (with only slightly-sloppy intoxication). It was a blast!

Totally not me– this is the Zazzle stock model with a preview of my actual shirt :)

We started out at one of those fun movie theaters where you can order dinner and drinks during the movie. We bought out an entire row for the Captain America: Civil War showing and invited friends to join us. We dressed up (of course) according to the theme: I wore my custom "Nerdy Thirty" shirt I created on Zazzle along with pigtails and tape around the center of my glasses. My sister traveled to town and dressed up as Yoshi from Super Mario Bros. It was a good time! After that, we all came back to the house and played some Sonic Racing while we ordered four gigantic pizzas. I got to show off my hobby room and a few of my miniatures– it was so nice to be able to share that with my friends. "I've seen pictures & all, but I had no idea they were this tiny! Does your brush have only one hair on it?!"

Once the pizza was here, we sat down to play "Red Flags" a card game I picked up at PAX South and met the incredibly kind-yet-twisted folks that created it. We enjoyed our mixed drinks– the "Light Side", various liquors mixed with Blue Curaçao, the "Dark Side" mixed with Grenadine and/or Cherry-Pomegranate juice, and the Master Chief Mojito (my personal favorite) that's basically a regular mojito– only mixed with Mountain Dew. Aw yeah! If you're interested, check out some great alcoholic and non-alcoholic beverages at TheDrunkenMoogle.com. Here are the ones that inspired us:

After that, it was getting late and we kicked it up a notch with the gaming enthusiasts that were still alive & kicking. Remember those LAN parties hosted at a friend's house where you'd bring your console, controllers, and play Halo all night? I really missed those so we did something similar and set up two consoles and TVs in the same room and played Halo until late with 90's music playing in the background. Weird Al's "Running with Scissors" album? Yep, still know all the words. Most everyone had to go home at that point besides the people staying with us, and they were video-gamed-out so I played the open beta for Overwatch until 3am. Good times.

Anyway, I pretty much got the thirtieth birthday of my dreams and it made my nerdy heart so happy! By the way, that Overwatch game is so much fun and I pre-ordered it– can't wait for May 24, 2016 :) Other than that, I don't have too much of a painting update since I've been planning and hosting and celebrating my mom on Mother's Day from afar, but I do have miniature-related news: I am finally about to confirm my Bones III rewards from the Reaper Kickstarter. (I know, I know, it's about time).

See, the problem is that I can't remember what I initially wanted to buy, so I now need to find things that add up to the money that I pledged– at least close to it. I've spent a bit too much on Kickstarters in 2015 and I want to make sure I'm not going over what I initially pledged. It'll take some time, and I've been putting it off for months knowing I had until Summer 2016. Now it's here and I better get to it– right now in fact!

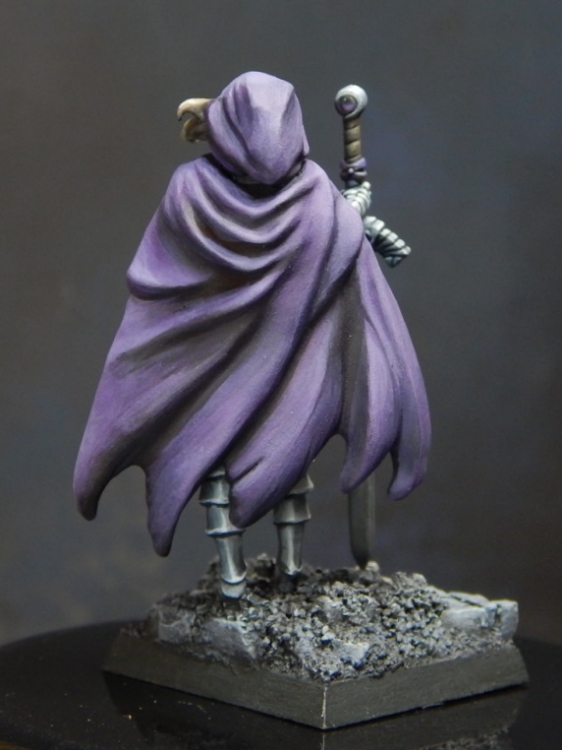
P.S. It's been an insanely busy week, but plan to paint this upcoming weekend (start the 48 hour countdown), and I'm really excited to start on the next Kingdom Death miniature and finish my weathering experiments on the Domina of Torment. I'll keep you all posted!

Kingdom Death Party

Ain't no party like a Kingdom Death party, 'cause a Kingdom Death party don't...

Stop. Time out. Let's recap here: I finished my very first Kingdom Death miniature.

Let's let that sink in. In 2014, I bought the "Pinups of Death Hard Plastic Collection" and I've been too intimidated to assemble and finish painting even ONE. Sound familiar? I know many people that are more collectors than active painters of these minis (and that's totally okay). For a beginning painter, they're challenging to assemble and paint. Many people hoard them until they feel they have the skills to tackle all that skin and hair and NMM metal. And if you're never ready to paint them? Well then, just keep collecting and when you decide to commission them for painting or sell them to a good home, you know who to contact– no judgement here :) Without further ado...

My Twilight Knight was the very first miniature I tried to gap fill with green stuff. The Kingdom Death models, especially the plastic, require gap filling and, for the longest time, Twilight Knight sat on my "someday shelf" (a.k.a. "shelf of shame") without a head or cape, which was damn creepy. I finally convinced myself to spend the time to complete her for my own personal enjoyment– a rare opportunity– and I decided to try a few things:

  1. Paint high contrast 
  2. Silver NMM practice
  3. Limited color palette
  4. Unconventional skin tone
  5. More "painterly" approach

Long story short, I feel like I incorporated each of those goals in a way:

  1. High contrast in the sword, leg wraps and tones all the way from "Pure Black" to "Pure White" in the NMM
  2. NMM (Non Metallic Metal)– always a challenge! Recently, I experiemented with gold. This time: silver.
  3. Limited palette using two leather browns, neutral black, pure black, pure white, and two purples
  4. Using a pink/purple cold skin tone rather than a warm skin tone like I tend to favor
  5. Not blending too much in the large expanses of fabric– take a look at her cloak (more on that below)


More about the "painterly approach": Anthony Rodriguez, from Pirate Monkey Painting, posted an interesting perspective: What if we removed ourselves from the obsession with perfect blending and welcomed a more painterly approach? Now, those aren't his words exactly, but if you want to know more about what I mean by "painterly", it's about incorporating creative application of color theory, visible brushstrokes and incorporating dynamic values, or contrast, within each piece. Now, I'm not claiming I have all these elements perfected in my Twilight Knight, but I did start to dabble in the idea of a "bigger picture" rather than hyper focusing on details. Check out Anthony's work on Putty & Paint here. It's a bold idea to stand up and say "We focus too much on blending!" and there prolific painters whose artistic success isn't limited to ultra-clean, obsessive technical paint application.

Ooookay, I'm going off on a bit of an artsy-fartsy tangent and probably losing some of you. To sum it up? James Wappel. You've seen his stuff, right? If you've spent time in the industry or attended Adepticon or other conventions, you've probably heard of him. If you're fairly new to painting tabletop minis, welcome! Check him out in the link above.  Jim is a master– his painting is thoughtful, brilliant, and seemingly effortless. His work has traces of brushstrokes in it and it's beautiful– the very definition of "painterly". He wields his creative genius with a giant filbert brush ($8 each, including tax) and his knowledge of color theory is second to none. Now don't get me wrong, I sound like I'm totally kissing butt, however, it leads into my next point: his approach is incredibly different than my own and makes my eyelids twitch.

In fact, one of my first painting classes was with James Wappel and it centered around shaded basecoats and glazing. I thought I was in the Twilight Zone. I mixed paint and applied thin layers of glazes, only to feel like a know-nothing fraud. "Am I even doing this right?" I asked. I kept looking at my neighbor and peeking at what they were painting, thinking I was missing something crucial in the guided class. Jim was totally chill and supportive reassuring us, "Don't overthink it, just apply the glazes and see what happens. Everyones will be different and that's totally okay". For a Type A person like myself, I admit, the very concept made my brain short circuit a bit. I stuck with it, though I didn't know if my results were good or bad. I left with my brain reeling and thanked Jim for what I lovingly called, "Anarchist Paint Class" because it absolutely threw everything I thought I knew about painting straight out of the nearest window. And sometimes you need that.

I painted my Kingdom Death miniature in a way that I didn't obsessively blend the ever-loving **** out of each surface area. I'd never thought I'd see the day. Now that you've read all this, take another look at the back of her cloak. See it now? I'm not claiming it's anything ground-breaking, but for me, it totally is and I'm damn proud of it. So proud, in fact, that I entertained the idea of painting more Kingdom Death miniatures immediately afterwards since the intimidation factor is now lessened. Since I've bought more Kingdom Death miniatures than I should have over the past 2 years (haven't we all?) I decided to bring them all out at the same time, maybe to shame myself in a way. I grouped boxes, opened bags, organized my favorites, and realized I was looking at a significant personal and financial investment I need to start completing. Yep, better get on this! I cleaned and filed the Gold Smoke Knight (for someone else) and the Pinup Sci-fi Twilight Knight (for myself). I made a mess, though to me, it's organized chaos:

Completing the clipping & cleaning process:

I truly hate the assembly and gap-filling process, but I just can't bear to not have control over this part, since it directly impacts the overall quality of the paint job.

Here she is– everything but her sword since I need to attach that after I've painted her, uh, backside:

While I waited for the Milliput gap filling to set, I used the extra mix to fill in a base of a Reaper miniature "Cheetah Girl" sculpted by Julie Guthrie. I purchased her as an option to consider when I was looking for an anthropomorphic player character for the Secret Sophie miniature exchange a few months ago. I worked around the precast base and I will add a few rocks and different textural elements as it dries.

In the meantime, I have a doctor appointment for some onoing stuff I'll probably talk about later if I'm in the mood for oversharing. Long story short, I'm still working through some emotional and hormonal issues and I'm currently balancing two jobs for two teams which doesn't help the stress factor. I'm totally committed to it, since it will hopefully pay off in a career promotion for me down the road. Still, it's time-consuming and difficult to manage shifting expectations as I jump into the frying pan.

In the name of unyielding positivity: I'm grateful to still be able to make the time to paint and for the people who support me. If you're going through a rough time and can't show it or share it, for whatever reason, I hope you find some balance and comfort in life. In the meantime, I hope you can find joy in painting, assembly, or just the purest form of miniature glory: hoarding!

Until next time :)

YouTubing & Paint Racking

This past week has been full of watching Dark Souls III on Twitch (especially Black Light Attack and his Big D*** Susan character), playing video games, painting, and putting together my new paint rack. I got braces on Wednesday... again. I had braces as a kid for four years and in the last decade, my teeth have shifted on their own enough to offset my bite. I'm not thrilled, but I'm told, luckily, it will only take about six months to correct. I'm okay with that. I've been told by seveal people my age, "What's it like having braces as an adult? I've been considering it for myself and it's inspiring to see someone else doing it!" Other than learning how to talk and smile with a lot of metal in your mouth, it's not so bad.

In fact, when Jonathan Phillips-Bradford from Eldritch Studios & Elizabeth Beckley (from Miniature Mistress fame) invited me to be on their new Tabletop Hangout show, I was really excited! Even though it was only one day after my braces and I was in a consderable amount of aching pain, I had a great time with the crew– Jonathan, Elizabeth, Kevin Clark and Heath Foley. It was a lot of goofy fun sitting around, painting and talking about what's been happening lately. We also got to play a quick round of Super Fight at the end, which was pretty fun. You'll have to watch it to see who wins in the end! A big thanks to the crew for having me on :) If you have some time, check out the Youtube Video here:

While we recorded, I worked on this little chibi Twilight Knight from Soda Pop miniatures. Her cape is coming along nicely! I'm hoping to make it a rich, silky purple and it's coming along nicely! I tell you what, it's really hard to paint while you laugh. Also, I know I hold my brush in a unique way and it's very obvious in the video. Oh well.

Earlier this week, I received my new paint rack from Impudent Mortal which was the first U.S. retailer I've found to carry a this! So far, I've only discovered paint racks from companies based in the United Kingdom and shipping would be too costly– sometimes just as much as the fixture itself! Impudent Mortal is based out of the state of Ohio and I found this for a very reasonable price. I'll admit, it took me awhile to assemble it. I was happy to find this "reverse paint rack" since I like to see the bottoms of the bottles rather than the tops, so I can easily see the colors I can choose from. All my paints, with the exception of a few metallics, are Reaper paints. The dropper bottles fit nicely in the rack's design and I knew it would be perfect mounted above my painting desk.

While the directions aren't included in the kit, they have easily accessible links for the assembly steps online. I found it odd that they didn't include them with the package, though I can appreciate them wanting to save on shipping clutter and paper by having an online resource. With a bit of super glue, the pieces fit together sturdily and I was able to mount it and start the hardest part– choosing which colors to fill it with.

Over an hour later (as I watched Netflix), I had arranged my newly mounted paint rack. I finally decided on this system for storing my paint– from top to bottom, left to right:

  1. Pure White > Greys > Pure Black
  2. Light Neutral > Dark Neutral
  3. Light Pink > Dark Red/Violet
  4. Light Purple > Purple/Blue > Blue
  5. Light Blue > Dark Blue > Green-Blues (my favorite colors)
  6. Light Green> Dark Green
  7. Yellow > Orange > Red
  8. Fair Skin Tone > Dark Skin Tones (arranged by triads)
  9. Light Earth Tones > Dark Browns

Sounds a little obsessive, huh? Well that's the way I like it :) It makes sense in my head this way!

Once I finished organizing my paints, I went to bed and after running errands the next day, sat down to put my paints to work! Since I'd worked on my chibi Twilight Knight earlier that week, I wanted to do more with my Kingdom Death Twilight Knight. I started out with neutral browns for her coat, but I guess I had too much fun painting the cloak of that chibi, since I changed to a rich purple. It matches her gems, and while I like my miniatures to have repeating colors, I'll need to find out what color to paint her hair that works with the overall color scheme. Any ideas? I considered painting her hair a strawberry-blonde or make her a redhead, but I think that would stand out far too much agains the purple cloak. Maybe a rich Earth Brown color? I'll have to sleep on it. I still have some sword and belt touch-ups to make as well as painting the base! Plenty more to go and I'd like to see her done before the month's end. It's taken long enough! In the meantime, I'll need to revisit my weathering project– more on that next time!