Pupil Progress

Nailed it! I'm finally in a place where I'm proud of the eyes that I paint. While it's not a perfect science, I've dedicated a large amount of time to practicing how to paint eyes and I'm seeing the results of that hard work! I obsess over the eyes of a miniature, as I explained in my last blog post. Facial expressions set the tone, or mood, of the miniature and I prefer to paint them first. If I'm happy with the eyes, there's a good chance I'll enjoy painting the rest of the mini. However, the reverse is also true: if I'm unhappy with a miniature's eyes, it's impossible for me to enjoy painting the rest of it. 

Noreth Skyblade · Reaper Miniatures #02994

 I've had this particular Reaper miniature on my shelf of shame for over a year. I really like painting elves-- the prettier the better! However, this particular gentleman elf was primed over a year ago and when I started to paint him, I discovered one of my very-talented painter friends had also just painted the same mini. While his version of Noreth is absolutely stunning, I felt discouraged at the time. "There's no way my miniature will ever look that good!" I thought. "I'll just end up being disappointed in the end" so I put him aside in July 2014 and vowed to paint him one day. Last night, I decided I was ready. I patched up some chipped primer (in all honesty, I should have stripped him and started over but I appreciate a good challenge!) His long jacket will be royal blue and I'll be painting some NMM on his boot armor, shield, and sword. I still don't think I'm to the level of Cash's version, but it no longer discourages me-- it inspires me to paint to that advanced skill level. So i started on his jacket base coat and while I waited for it to try, I started on his eyes.

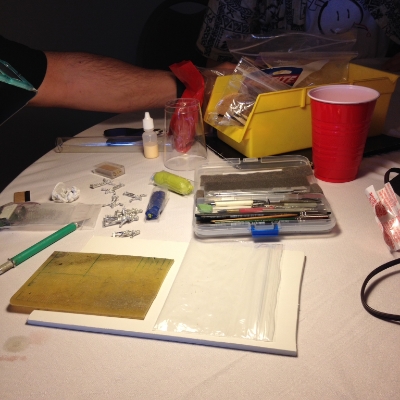
Eyes are a painfully long process and it's something that I put pressure on myself to get "just right". However, I watch a lot of anime, and I'm influenced by that particular stylized eye. I attempt to paint my miniatures with big, expressive eyes and I'd like to incorporate that into my consistent painting style. Here's what I started with last night (see below with paint line-up) and the Instagram photo below that is what I ended up with. It was hard to believe I hadn't picked up my brush since ReaperCon. Over the last week, I've been working on cleaning and assembling new minis, and only now have been able to apply the knowledge that I learned at the Con and apply it to what I'm painting at the time. Something must be working, since I'm now "seeing" things I was unable to identify before attending the Con. Now that I know what I want to see, I attempt to match my expectations to my current skill level-- I was shocked at what I was able to accomplish in a year! While my minis, even my guys, have heavy outlines around their eyes, I like it-- it's my preference, since I appreciate painting clean, high contrast when it comes to expressive faces. It takes considerably longer, but it's hard to argue with the results!

In addition to Noreth, I'm also working on Dannin Deepaxe, a Dwarven Reaper mini I've owned for a long time. She's been cleaned up and primed (despite the constant rainy weather we've been having!) She's a smaller sculpt than humans, so I thought her eyes would be more difficult to paint. However, Werner Klocke sculpts some big eyes for painters to enjoy and play around with. He really does a great job with this, and I'm able to push-the-envelope when it comes to painting interesting eyes! Next up for these miniatures-- hair! I haven't decided on color scheme, but I hope to be struck with inspiration tomorrow when I pick up my brush. Some days I have it, others I don't-- let's hope tomorrow's another "great painting day". Wish me luck!

Eye Spy a Challenge

Costume design reference

Ah, poor Rosie. I wanted to paint her up for ReaperCon, but she was one of the miniatures left by the wayside as I scrambled to finish the miniatures I'd already started. This sculpt reminds me of Kaylee from Firefly (one of my very favorite shows) so I decided to research a few costume design pictures-- I think I'll paint her clothing to match! It sounds like a fun challenge since I'll need to paint freehand flowers on her shirt sleeves. I also want to try some oil spatters after taking the "Weathering Effects" class. I paint everything pristine and I want to try painting dirty things. I mean, she's a mechanic, y'know? She'll eventually be holding a wrench in her raised hand that extends behind her head, but I don't want to attach it before I paint the back of her hair. Excited and nervous about this one-- it seems a pretty big challenge, but I'm always trying to push myself to try new techniques. 

While I want to jump right into the freehand and weathering techniques, I have to start with the eyes. First, I painted a few light coats of brush-on primer on Rosie. Since eyes are one of the most important parts of a miniature for me, I often don't want to move on until they're "just right" and I'll be distracted from the new techniques I want to try (or just give up since no matter how good the rest of the mini looks, if her eyes suck, it kills my motivation). Silly, maybe, but I know myself well. The Shelf of Shame is littered with my previous eye painting failures. 

Here you can scroll through my initial process with painting eyes along with a more recent picture where her eyes are complete and a few of her outfit shapes are blocked out in dark liner. (It may look messy now, but it won't when I'm done with her!) And yes, I included my nails in the photo crops because it's rare when they look nice-- honestly, it's for pure vanity and to prove I actually paint them once in a while. So without further ado:


Reaper Miniature #50016 · Rosie, Chronotechnician · Sculpted by Bob Ridolfi

Add a dash of color + a spot of pure white = voila!


Okay, okay, it's not that easy :) In fact, it took me three tries to get these white dots right and they're still too big in my opinion. Anyway, if I mess with them more they'll get too chunky-- so they're good enough for now! Some days, I'm never happy with the eyes I paint. I make the mistake if over-working them until the paint builds up too much and I have to start over. Other days, I have "good days" and end up with stuff like this:

Arnise Work In Progress - click picture to zoom

Andromedan Hunter - click picture to zoom

One day, I think I'll try a detailed eye painting tutorial blog post now that I have a decent camera to capture details more easily. The photos above were taken with my sad little phone and it shows :( Once I figure out the lighting, it's only a matter of time before tutorials will be an option! Studying how different painters approached various painting techniques was extremely helpful to me as I began miniature painting. It remains useful and interesting for me today-- there's always something to learn from everyone! 

Do you want to see tutorials here? If so, which ones?

My ReaperCon 2015 Classes

Hats off to the artists who teach classes at ReaperCon! One of the things I like the most about this convention is the opportunity to interact with the guest painters and sculptors who share their knowledge and take the extra time to give people requested feedback on their work. The Con-goers are encouraged to approach them in between their classes and ask questions or just watch them paint and/or sculpt. Most are only scheduled to teach one class per day so there's plenty of time to meet with them.  

I attended a maximum of eight classes at ReaperCon this year. I challenged myself with taking classes on topics that were "out of my comfort zone". I enjoy painting the figure as they're seen ideally-- with perfect smooth blending, beautiful face features (no scars, etc), and squeaky-clean line quality. What I have not applied is weathering techniques, advanced sculpted-from-scratch diorama basing, conversion sculpting of any kind or airbrush techniques. Those were the classes I focused on since I have so much more to learn!

My first class was Aaron Lovejoy's "Airbrush Basics" class. Aaron shared his knowledge about which airbrush models he enjoys using, how using airbrushes can speed up the initial painting process, and most importantly, how to keep your airbrush in good, clean working condition (fight the clog!). He gave a tutorial on a large Bones miniature that we passed around the room in between each step as he explained what he was achieving through layering airbrush colors. Prior to this class, I was not ready to invest in an airbrush (they can be very expensive!), but after Aaron's suggestion of starting with the cheapest model and just trying it out to see if you like it, I think I'll give it a shot! He recommended using an airbrush only in the beginning stages to block out interesting lighting effects before you pick up the paint brush for detailing "cause you still have to paint it. An airbrush is a tool but it shouldn't be the only tool". I definitely recommend this class if you're a beginner to airbrushing!

Weathering Techniques - Brice did a nice job teaching this class. Attempting to cover a myriad of weathering techniques (and fielding on-the-spot requests) is quite a challenge! Although the projector was set up to capture the tutorial details, it wasn't as successful as we'd hoped. While the cameras and TVs were a great idea, it was the first year they were used and were bound to run into a few quirks. We ended up passing around the miniature as Brice demonstrated different techniques-- we made it work! I've avoided weathering until now, and I notice it's significantly limited the variety of miniatures I can paint. For example, an orc wouldn't have a pristine shield with polished, expensive  metal, so I avoid painting them. As I struggled to paint my Troll Axer, I realized: there's no such thing as a pretty orc! The idea of taking a sponge or dry pigment and applying paint in random patterns to make a miniature purposely sloppy or messy makes me cringe. However, this is exactly why I wanted to take this class! Brice's competition entries are proof that weathering can be beautiful and add lots of personality and character to your miniatures (and his cloak freehand-- wow!)

Crafting Terrain & Diorama Bases - Bob is awesome. I can't say that enough. He's a nice guy with an endless supply of funny stories and a wealth of knowledge that can only come from decades of industry experience. I took one of his classes at the Reaper Artist Conference back in October and knew going to this class, I'd learn quite a bit about what to use and, sometimes more importantly, what not to use, especially if you're clumsy like me (MEK glue - Methyl Ethyl Ketone. It's super-toxic!). We watched him put together a base and work his magic with styrofoam, styrene, cork and kitty litter (yes you read that right, unused litter of course!). It was really useful for me to see which order he puts things down in and how he applies it with his special mix of watery wood glue paste. And now I have a nice, long list of cheap-and-effective basing supplies to collect! I love the bases he sculpted out of styrene and plastic or metal cogs-- "They're easy!"

Intro to Competitive & Display Painting - My brain overloaded in this class-- it blew my mind (in a really, really good way!). Justin McCoy, founder and President of Secret Weapon Miniatures, spewed rapid-fire brilliance at us and covered an array of intermediate-to-advanced topics that turned everything I thought I knew upside-down and made me more passionate about this hobby (though I didn't think it possible). It was like taking a college-level art course (and not that "Art Appreciation for Non-Art Majors" bullsh*t). What'd we cover? Lots. Too much to list here. He covered everything from dissecting individual design elements of classical paintings, re-evaluating the color wheel concept we think we know, explaining what-makes-this-awesome examples from his slideshow and applying these concepts to our miniatures. Of the few classes I took that incorporated a TV and visual references, this one was executed the best. Justin's energy is contagious (think Philip DeFranco) and while the concepts are serious, his style of teaching is fun and casual. I could go on, but you'll just have to take the class yourself-- I hope he teaches it again next year! 

Painting Fur, Scales, & Feathers - Derek Schubert, you make this look easy. Studying miniature painting with Derek will show you a more intellectual side of painting. He's articulate, methodical in his painting, and he does a mean Monty Python impression! Oh and his painting is stupid-good. While some people take his classes thinking they'll be able to paint just like Derek after only 2 hours, we have to remember that he's been honing his talent for many years. Last year I was lucky enough to see the very first miniature he ever painted in person. He may have painted it when he was 11 years old, but it was encouraging to realize that it looked a lot like my very own first miniature. During this class we each painted a Reaper wolf mini (which he sculpted for Reaper) while he shared with us tips & tricks to painting more natural textures. Derek created a great piece awhile back titled "Liriel Unplugged" which included many well-painted critters gathering for a musical show under the forest canopy. He encouraged us to do our research and find various pictures of these animals to reference while we paint (he brought us each different wolf references to use during the class). He also demonstrated his techniques for feathers and scales and passed around previously-painted examples of his, including the Lamia I love so much!

"Sculpting Accessories for Conversions and Bases" with Bob Ridolfi. I'm new to sculpting, but I've been curious about conversions and adding more interesting custom elements to a base. Many times I've thought "if only I could fix ____" (maybe a funky hand that didn't quite translate from the original mold) or "I wish I could add a ___ detail on this base" when working with a mini. Of course, there's always the "Oh @$&# I just cut off part of her foot with the clippers, how can I salvage this?!" (trust me, it happened). One of the things I really like about Bob's classes is that he keeps it a fairly open format. He's so knowledgeable that he's able to say "Ok, what do you want to see? What do you want to know?" and you make requests and his hands go to work while he makes it on the spot, all the while talking about what he's doing and how. We passed around a few examples, including some "Captain Goodhair" fun when we wanted to see how he applied & sculpted hair. Love it!

Advanced Basing with Michael Proctor

Michael's work is a whimsical mix of color and texture. Many of his pieces incorporate natural elements-- dried leaves, mushrooms, interesting pieces of bark, and whatever else he finds interesting on his nature adventures (he lives in the beautiful state of Colorado). In this class, we passed around a few examples of his work that have won multiple awards at different conventions. One of my favorites is his "Toad King" GenCon entry. Michael explains how he creates bases to enhance the story and character of his miniature. While he's painting, he's inspired to craft a base specifically for the miniature, rather than building a base first and hoping it matches a future painted mini. 

NMM Special Effects with Derek Schubert

Derek used examples of his past work to explain how he approaches Non Metallic Metals-- in both traditional metals (i.e. a Paladin with bright silver armor) and fantasy metals (i.e. an elf in purple armor). The most important part of the process, he explained, "is visualizing how the light will interact with a reflective surface". He painted a sphere, cylinder, cone, and cube on a piece of paper to show us where the highlights, shadows, and other values would fall. My struggle with NMM is just that-- while I could study individual metals in different shapes, I never quite seem to know where to paint them when combined as interacting shapes in sculpted armor. Taking them more than one section at a time while paying attention to the overall light source is my new goal. I'll incorporate a shaded base coat technique so I don't get bogged down in details and look up only to realize I've skewed my intended light source. Derek's class helped me "see" details that I previously not been able to process. For example, I'd see an NMM sword and think, "That sword looks amazing!" Why? "Well it's just painted really well" But why? Now I'm able to identify that great NMM will contain color reflections in the surface, appropriately placed values with high contrast. The idea of "putting the darkest color next to the lightest color" is not a realistic, universal technique. This class really made me think!

I have a lot to work on in the next year. I practiced the techniques I learned in my 2014 classes last year over many months, and I'm happy to report that I've seen a lot of improvement in my own painting! I'll be creating more "Work in Progress" blog posts where I attempt to recreate some of these new techniques and I can't wait to see what I discover-- many of the lessons I've learned have been the result of trial-and-error, or as I like to call them, "happy accidents". I still have a long way to go, and I have plenty to keep me fueled in my continued miniature painting journey!