Shaded Metallics

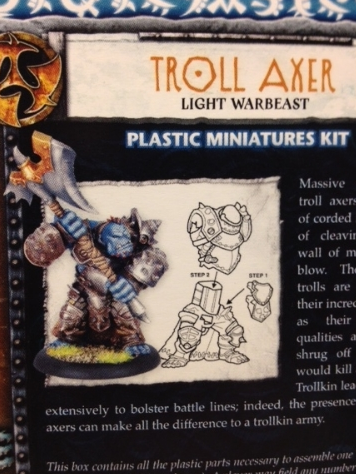
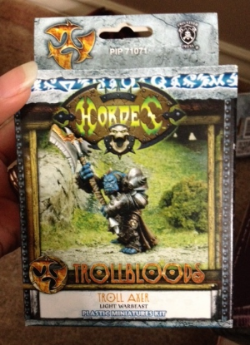
Last week I started the Troll Axer and wanted to learn more about Shaded Metallics. I did some research and here's what I found:

From what I gathered, Shaded Metallics (a.k.a. "TMM: True Metallic Metal") is a method in which one paints shades of metallic-based paints to mimic metal surfaces. (I know that sounds like the lamest definition ever but bear with me). Instead of painting a section of a mini with a few coats of the same color of metallic paint and moving on, the idea of Shaded Metallics takes it a step further. In this case, you would limit the reflection of the metallic base coat with a darker, non-metallic paint. After learning that in my research, my first thought was, "Why in the world would you undo what you just painted in in the first place?".

To my understanding, metallic paint, when applied to such small surfaces, is too unpredictable and doesn't allow for a realistic look. I found one of my miniatures that was painted with simple metallic paint and tried rotating it around under a light source-- I saw lots of reflections in both the highlighted parts and the parts that should be in partial shadow. In this case, the painter has no control over the metallic paint and it can completely derail your attempt at painting a fixed lighted source, an overall dark tone/color scheme, or can simply be too bright and distracting to the viewer (Ooh, shiny!). Just think of the new pewter mini you take out of the original package-- it's hard to make out all the details since the light reflections distort some of the shapes and obscure your ability to see each surface clearly. Once you prime the mini and neutralize the shininess (and especially if you do a quick dark wash) the details become much easier to see. 

In the past, I've tried to cut down on the metallic paint with washes of Pure Black (which I now rarely use), and I ended up with a muddy result-- Captain Dish Rag being a prime example:


"Captain Dish Rag" painted Spring 2013

Shaded Metallics isn't just about toning down the metallic paint, it's also about bringing it up with highlights. Instead of using one metallic paint in this instance, one would use two or more-- one for the base coat and a lighter metallic color for the highlights. 

Shaded Metallic Test #1: Layering 

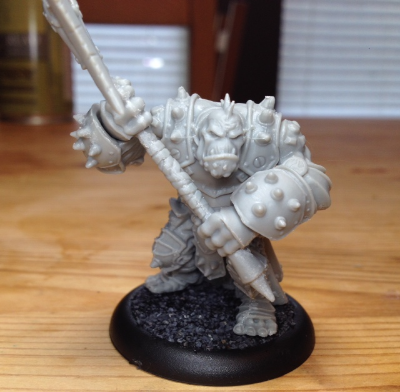
With Troll Axer, I followed the layering technique on the right knee armor section (step-by-step below) 

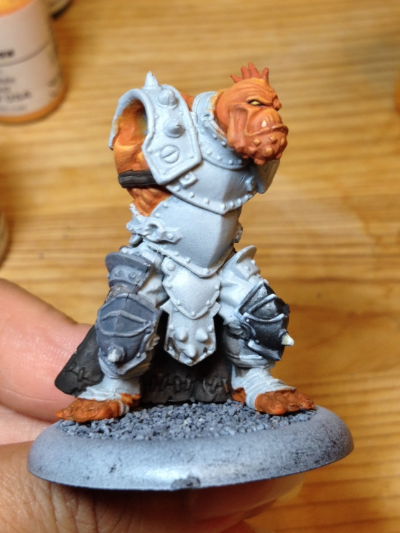
  1. Painted two thin coats of metallic paint and then started shading with thin, super-dark-blue glazes. I made sure to blend the border of the matte glaze where it met the metallic base coat.
  2. Added a lighter metallic of "Polished Silver" on the upper parts of the pointed sections to show that it would reflect more light than the lower portions.
  3. Added near-white highlights on "hot spots" where I thought the most light would be reflected-- mostly in corners and top lip sections of the armor panels. This took awhile and I'm not sure if I even got the look right.

Honestly, I feel like I could have done NMM (Non-Metallic Metal) in that time it took to layer smoothly. Since it was my first time, I'm sure I'd be faster at TMM in the future, but I decided to try another idea to round out my TMM study...

Shaded Metallic Test #2: Washing 

Using a wash of Citadel "Nuln Oil" Shade over the metallic base coat

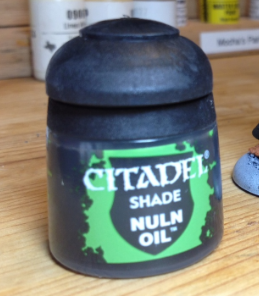
I purchased this on Amazon a few weeks ago after reading about Citadel "Shade" paints:

Citadel Shades are specially formulated to flow over other paints and into the recesses on your miniatures, defining details and accentuating recesses. Once applied, they dry to provide very effective, matte shading for your models.
— http://www.games-workshop.com

It seemed pretty easy so I followed these two steps:

  1. I painted the same thin coats of the base metallic paint on the left knee
  2. Used a wash of Citadel Nuln Oil

Before I started the first round of highlights, I decided to open a bottle of Malbec and pour myself a glass while I waited for it to dry. When I returned, I gave a surprised "What the... that can't be right!". After I had spent all that time layering his other knee armor section, the wash seemed to have mimicked the look in a fraction of the time. I didn't believe it, so I painted the base metallic coat on the rest of his upper torso & shoulder armor, let it dry and applied a wash of Nuln Oil over that. I realized it wasn't just dumb luck and admitted to myself, "Oook, that's stupid-easy".

After that, I did some shading on his mid-section with that matte-dark blue from Test #1 and realized the combination of layering glazes and shade washes will yield the best results. Test #2 isn't as controlled and as clean as the #1 layering technique, but I think it pays off in efficiency. While the Nuln Oil/combo sections aren't yet highlighted, you can see how I skipped a few layering steps when comparing one knee to the other:

I know that as I continue, I'll probably use a mix of these two techniques on this miniature and see what results I can achieve as I paint over this weekend. I know there's much more for me to learn with the Shaded Metallic techniques and many happy accidents for me to discover. Overall, I think I'm off to a good start. See you next Miniature Monday!

Work In Progress: Troll Axer

Happy Miniature Monday!

I started my very first Privateer Press miniature this weekend: Hordes "Troll Axer". Once I found out what he'd look like when fully-assembled (see below), I couldn't wait to get started!

Privateer Press · Hordes · Troll Axer

However, my impatient nature got the better of me, and I totally missed the clearly outlined Steps 1 & 2 on the back of the box.

Luckily, my IKEA-assembling-skills came to the rescue when I decided to skip the directions in the spirit of artistic license. I just started gluing stuff together. I blame the new anime series I watched on Crunchyroll while cleaning, priming, and preparing the miniature for assembly-- subtitles demand way too much attention. While I don't foresee any future consequences of my initial oversight, I should pay closer attention next time. Lesson learned. I'm now choosing to paint the pieces separately and then assemble the parts near the end. Better safe than sorry! Since most of the miniatures I've painted have been cast in one piece, I don't have much experience with mini assembly. Let's see how this paint-sections-separately method works out. 

The painted example of this Trollblood is blue on the box, so I decided to go in a completely different direction and chose an orange/dark charcoal metallic color scheme. I wasn't sure how orange would look on him so I started painting the skin tones first. I'm pretty happy with how his skin is turning out so far!

Base Coat

Blended Shading/Highlights

He's been sculpted wearing heavy armor so I want to study Shaded Metallics this week. I've heard quite a bit about NMM (Non-Metallic Metal), where one paints the visual effects of metal surfaces without using metallic paints-- a challenging prospect when painting 3D figures. I can understand why one of my miniature painter friends describes painting NMM as "a slog.. every time". While the Shaded Metallics/True Metallic Metal (TMM) technique is less popular, I've heard it's considerably less time-consuming. I want to be able to call upon that technique for basic tabletop miniatures so I won't continue to shy away from minis that are sculpted with heavy armor.

Reading up on TMM and running a few isolated experiments on Troll Axer as the focus for my next blog post. See you Thursday!

Miniature Monogamy

For the past three years, I've painted exclusively Reaper miniatures. Reaper was the first miniature company I discovered when I started painting a few years ago. I've collected their minis over that time until I amassed this hoard:

I feel like owe a lot to Reaper. ReaperCon 2014 was the first convention I attended-- a four-day convention with tabletop gaming, sculpting & painting classes, contests, and panels with some of the best artists in the industry. It was a great experience learning from kind people willing to share their knowledge. ReaperCon inspired me to paint more, paint often, and keep working to improve my skills. I'll definitely be returning next year.

Lately, I've challenged myself to become more involved in the community and research as many different companies as possible in order to expand my knowledge of the hobby. Here's what's in my mixed bag so far:

Privateer Press - Hordes

Mantic Miniatures

Infinity Miniatures

Alkemy Miniatures

I know many people only paint a certain type of miniature-- especially ones specific to their particular gaming system. Others find a miniature sculptor they like, either within a company or one who sculpts for multiple companies, and purchase their work knowing the quality of the sculpt will make a difference. This past Monday, I received a shipment of Infinity miniatures I purchased when I became obsessed with the dynamic style and detailed quality of Corvus Belli's miniatures. I admit I had a hard time paring it down and when I opened this box, I knew I'd gone overboard:

Like I mentioned in my "...and Beyond!" post, I appreciate well-proportioned 25-28mm miniatures with dynamic poses, expressive faces, and well-rendered details. I haven't painted enough different types of miniatures to have specific preferences-- that's the main reason why I'm running this experiment. So far, I only know what I don't want to paint. For example, I'm a bit embarrassed to admit I don't care to paint skeletons or zombies-- it's just not my cup of tea. I find it difficult to stare at a mini for hours at a time when all I think when I look at it is, "eww" (I often sound like a 5 year old). However, I have a great appreciation for painters who are able to use many different styles to paint a broad range of miniatures-- from beautiful ladies to ghoulish monsters, terrain, mecha robots, and everything in between. I aspire to one day be that experienced and well-rounded in my own painting. I also realize that once I'm able to paint faster, I know that painting miniatures I don't particularly care for will become less of an issue since each one won't be a serious time commitment. 

In the meantime, I'll continue to research more companies and find as many different examples of miniatures as I can to find out what I like (and dislike) about the materials they're made out of, the quality of the sculpt, style, and overall experience. I find that I'm inspired to try new painting techniques on different miniature styles-- it can't hurt to mix it up!

While I'll always have a special place in my heart for Reaper miniatures (and Lord knows I have enough in my stash and will be painting them for years to come), after three years, I'm ready to branch out and paint some other types of miniatures. I admit, I feel a little guilty ending my monogamous relationship with these Reaper minis. At the very least, I'll be able to speak from experience when I talk about the pros/cons surrounding the different types of miniatures. First up will be a Privateer Press miniature and an Infinity miniature. I'll start each of them this weekend and have some Works In Progress pictures to show next week. We'll see how it goes!