Gold Non Metallic Metal

My Restart Day was a success– I painted for about 8 total hours this weekend! I made some great progress in prepping some new miniatures as well as tackling one of the biggest challenges that's plagued me for awhile: Gold Non-Metallic Metal (aka "NMM"). I've been experimenting with both True Metallic Metals in bronze & silver (Ursula and Lord Ironraven respectively). However, I've been dabbling very little with Non-Metallic Metals (in fact, my only real NMM attempt has been Gus's monochrome chains) so this weekend I attempted to paint a rich gold on the Janna the Wanderer Reaper Miniature. 

At first, I re-watched the NMM chapter Darksword's "Masterworks Miniatures Painting with Jessica Rich". I love Jessica's painting style and I've had the pleasure of meeting her in person and taking two of her classes at ReaperCon. She's an incredibly talented painter, a wonderful teacher, and a very nice person. While I don't own any of her go-to paint colors for gold (Terra Nova Tundra, anyone?), I attempted to find something similar. However, my color theory could use some work! At first, I made the mistake of thinking "Gold = Yellow". Well, yes and no. I chose a bright punch-you-in-the-face-yellow that didn't mix well with any of the browns that I used to darken it. I thought, "It's too yellow. It needs to be warmer and more orange" so I added a rusty brown. Nope, even worse. Now the metal just looked like an unnatural burnt orange. Finally I scrapped that idea, took a break, and went back to the drawing board. I looked up a few examples of gold and decided I wanted something with a green/brown tinge to it rather than something with a yellow/red rust color. After that, I landed on the right combination– just a small touch of yellow along with a yellowy-brown and an off-white for the highlights. I'm not saying it's the perfect combination, but it worked well enough for me for this first gold NMM attempt. I'll be sure to experiment with other colors– including the combination Jessica suggests for the rich, warm gold color she paints so well! Here was my original inspiration: 

Jason Chan has created some truly beautiful art for Magic The Gathering. I love this image of the Deathpact Angel– it's a wonderful example of a muted gold. While I chose to bump up the gold on my miniature with a bit more yellow, this image helped me identify where the light would fall on a metal bodice. I'd love to paint one of the Darksword winged miniatures I have in this muted gold paired with dark grey/purple wings. Without further ado, here's some Work-In-Progress pictures of Janna and my first attempt at gold non-metallic metals:

BASE COATS + SKIN + LINING

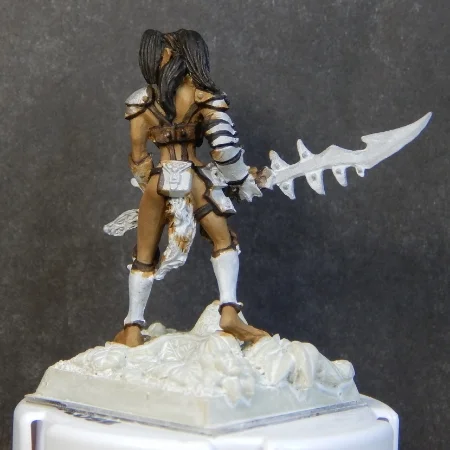
GOLD NMM: Work In pRogress

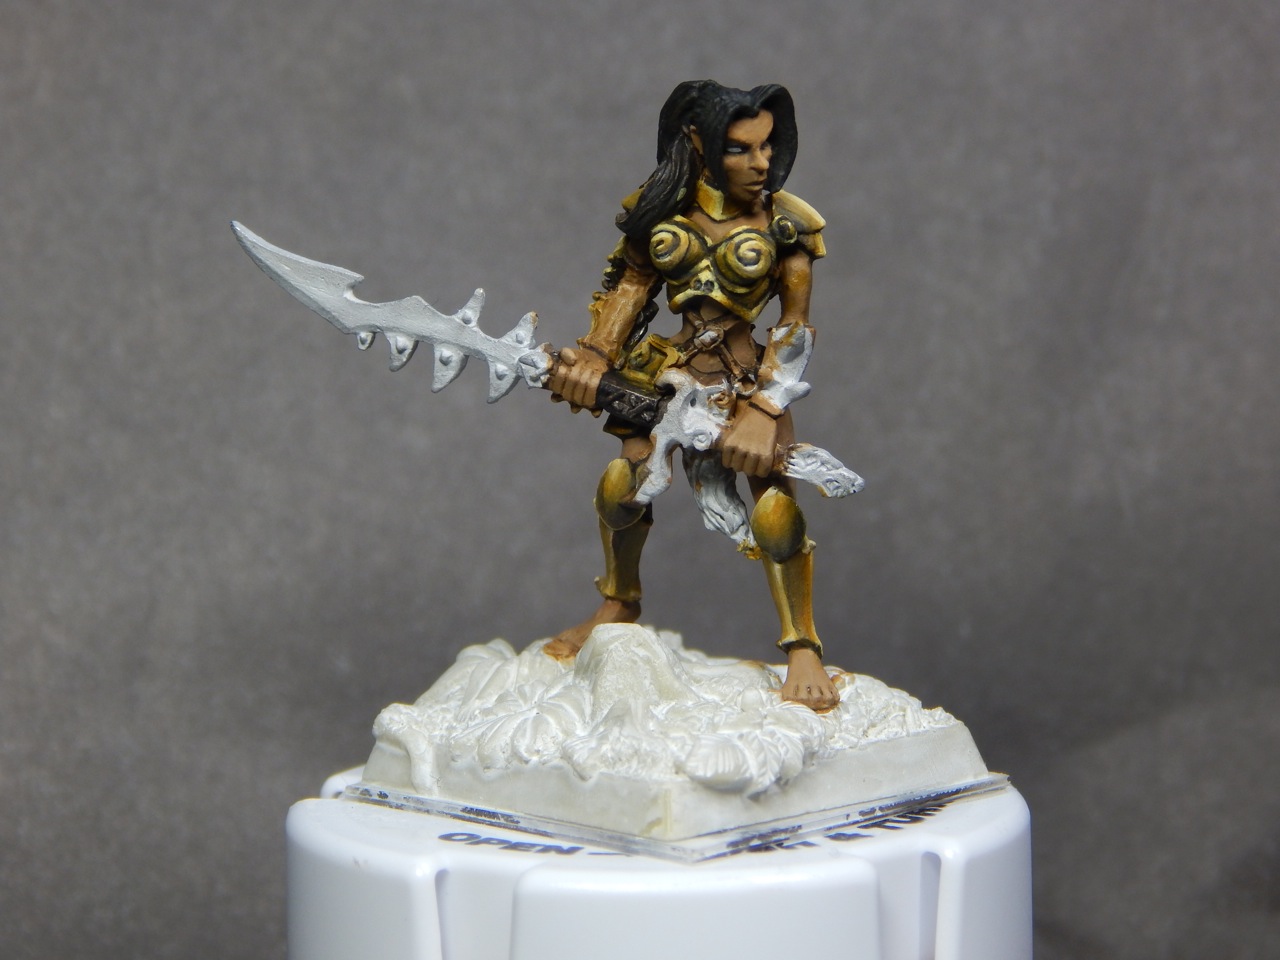
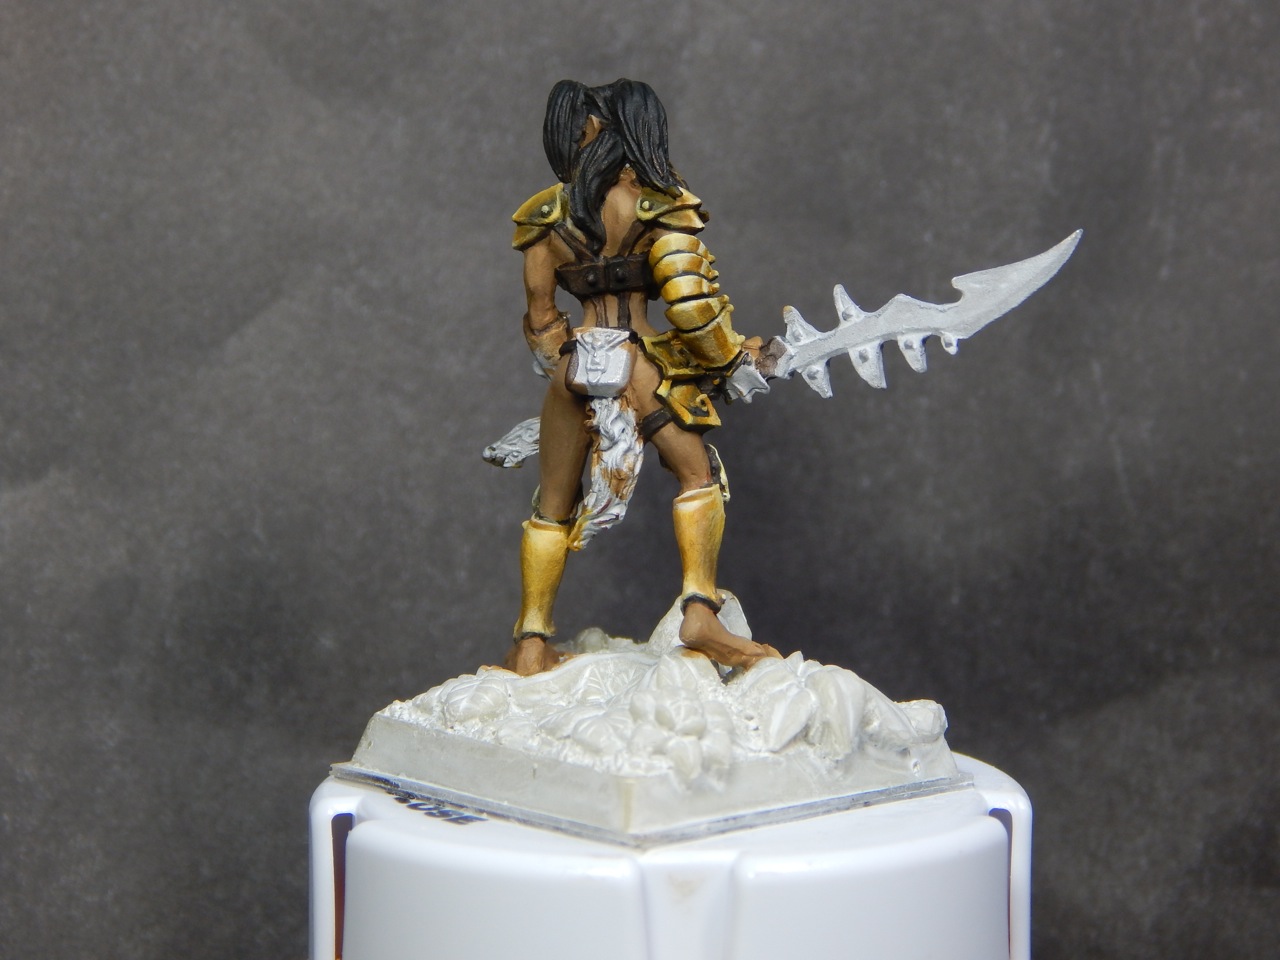
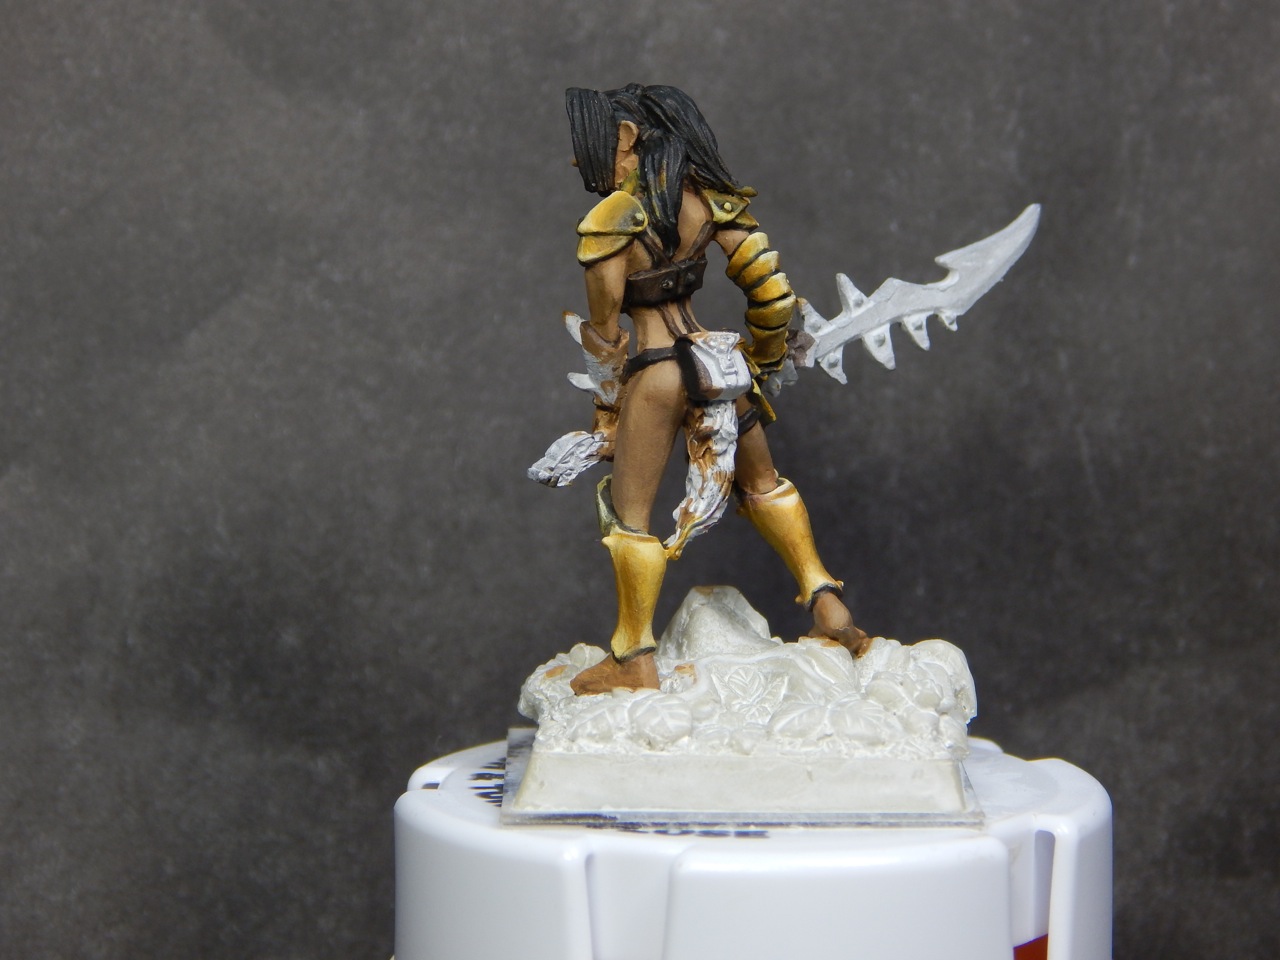
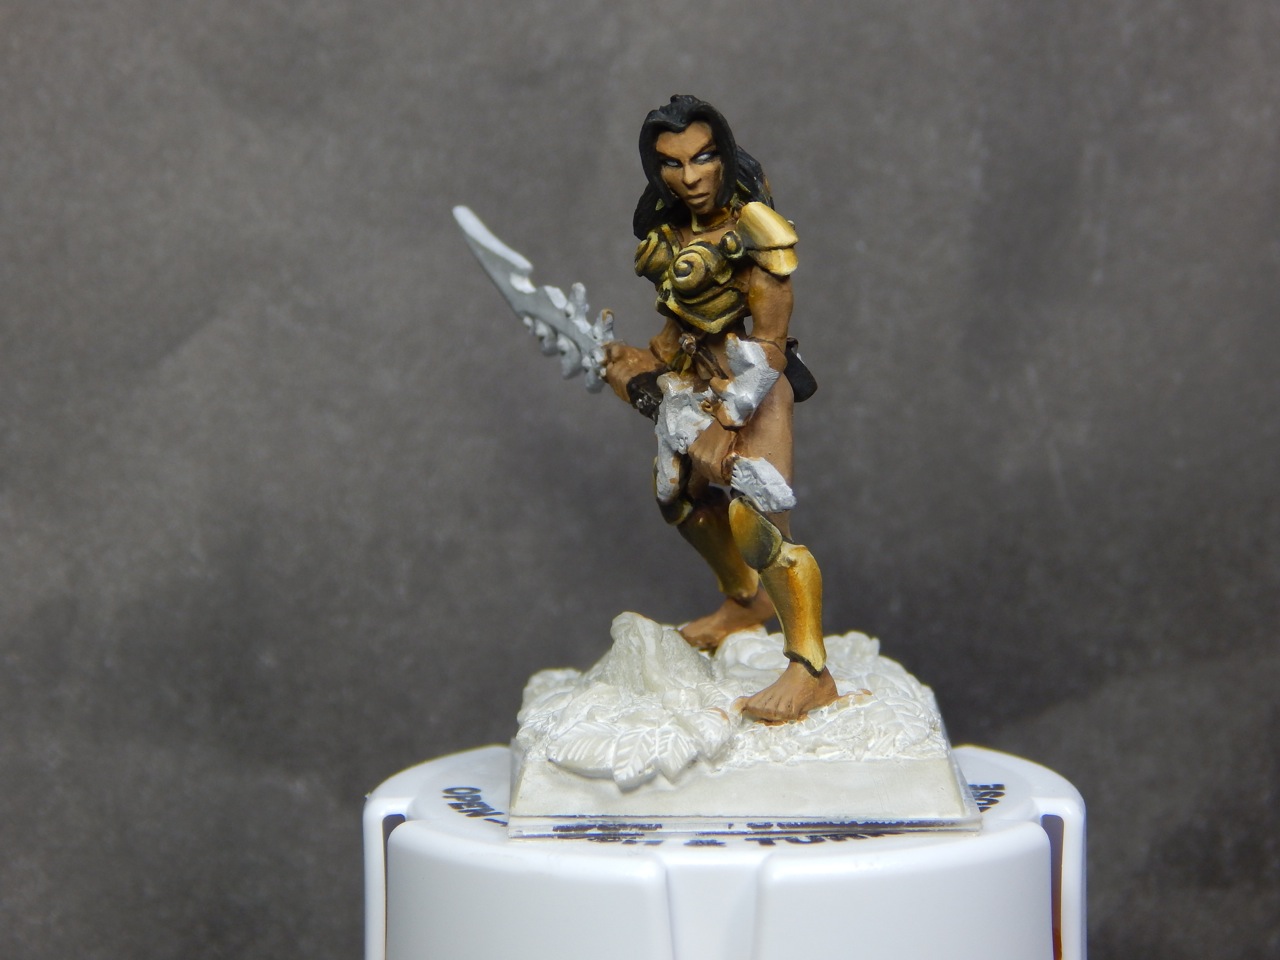
Right now, she's basically only skin color, outlines, and gold NMM. There's plenty of work left to do on her, but she's off to a great start! 

Ursula · More True Metallic Metals (Part 2)

This is a continued experiment with gold True Metallic Metals. I haven't used a lot of the metallic paints before and I haven't practiced any TMM techniques since painting Lord Ironraven. In this experiment, I wanted a bronze, greenish-effect on the battle axe of Reaper Miniature "Ursula". I also wanted to paint some fun, bolder colors on her hair and bodice. I haven't painted orange hair before, and it was an interesting contrast to dull down the metallic paint and build up bright colors elsewhere on the miniature at the same time. 

For the metals, I painted a base coat 50/50 mix of Privateer Press P3's "Blighted Gold" & "Rhulic Gold". Then I added multiple, thin layers of Reaper "Green Shadow" to give a green tint to the metallic base color. I then highlighted and edged in Rhulic gold, though it doesn't read very well in these photos (a definite downside to TMM). Natural light definitely helped in these photos, and I'll soon decide if I want to paint a few touch-ups that will look better on camera and then take final pictures. For the rest of the colors, I used a wide range of Reaper paints:

  • Hair: Rust Brown, Marigold Yellow, Pure White
  • Bodice, Gloves, and Belt Sash: Surf Aqua, Blue Liner & Leather White 
  • Fur: Leather White, Brown Liner
  • Scale Cape (I call it her "Acorn Cape"): Olive Skin Shadow, Brown Liner, Leather White
  • Axe Handle: Olive Skin Shadow, Brown Liner
  • Eye Patch: Olive Skin Shadow, Leather White, Brown Liner

I decided not to line the TMM metal edges in an off-white and paint "hot spots" in a pure white, a common practice in NMM-- I'm not convinced I should mix the techniques. I think that matte white paint may stand out too much from the metallic paints and distract from the intended effect. Otherwise, I'm pleased with Ursula as a TMM practice miniature. She's one of the minis that's been sitting on my shelf for a long, long time after years of being intimidated by both TMM & NMM techniques. I improve only by experimenting with these different techniques, and I always learn something new each time I try-- some lessons learned from mistakes, others are happy accidents that I try to recreate on future miniatures. 

My Custom Pokey Tool

Everybody has a "Pokey Tool" for when the paint dropper bottle gets clogged. However, I don't. I have been using a wall push pin, which is not very effective. I've seen other pokey tools. In fact, many people at ReaperCon 2014 bought the metal skull pokey tool which had a very nice weight to it, but it just wasn't my style. I fully admit, I like cute things with big eyes like I'm five years old and it's ingrained into my very nature. (I'm half-Asian, or technically, "Pacific Islander" if you're filling out bubbles on a standardized grade school test). Regardless, I made up my mind long ago that my miniature painting pokey tool should be cute. And I have yet to find one after two years of painting, so I decided to make one myself using Sanrio's Chococat key holder and a pin. I started out using a pin from my old sewing kit and quickly realized the plastic ball on the top just wasn't going to work. The top warped the key cover and removing the ball wouldn't allow the super glue to adhere properly.

So I dug around in the depths of my old sewing supplies and found my magnetic pin cushion. I needed a T-pin to be able to glue the flat, wide surface area to the inside of the key holder. Unfortunately, finding a T-pin proved difficult-- kind of like finding a needle in a... well, needle stack. After suffering only one minor puncture wound, I found a T-pin and prepped my final supplies.

Once I applied super glue to the top part of the T-pin, I placed it inside and centered it, leaving about 25% of the T-pin inside the key cover. Then I held it together until the glue set, about 1 minute just to be safe. I love this picture-- it looks like Chococat is grimacing because I'm smooshing his face while the glue dries. Then I let it sit on my desk for about 5 minutes.

Next, it was time for the final test! I gathered a stubborn dropper bottle of paint and hoped for the best!

Success! Not only did the super glue hold well, the rubber key cover was incredibly comfortable to grip (unlike pins without handles) and it came away cleanly after poking through the top of the stubborn paint bottle. I'm very pleased. Not only do I have a cute & unique custom pokey tool, I can replace the chain and hang it on a peg by my desk for easy access. Brilliant. 

If you're thinking about making your own miniature painting pokey tool, consider using a T-pin and a key cover/key holder. Or create something similar out of clay, push T-pin into the center before baking in the the oven until set. Then, remove your new pokey tool and let it cool. As long as the clay isn't too thin around the T-pin, it should offer enough support as a pokey tool. Give it a try & share your results with me! Everyone needs a "Pokey Tool" and why not have yours reflect your own personal style?