Infinity Hacker WIP

Happy Miniature Monday! Yesterday was rainy-- the type of weather that makes it impossible to tell the time. A perfect day for painting! This weekend I realized that I've been unwittingly putting off painting my Infinity miniatures due to their small size and delicate assembly. So yesterday I decided to start my first Infinity miniature-- a Djanbazan Hacker.

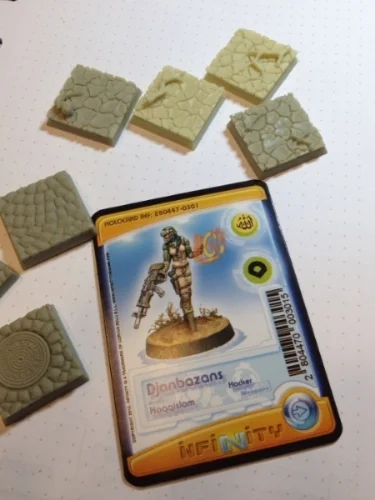
First, I picked out a precast base for her and went with one of my desert wasteland options: 

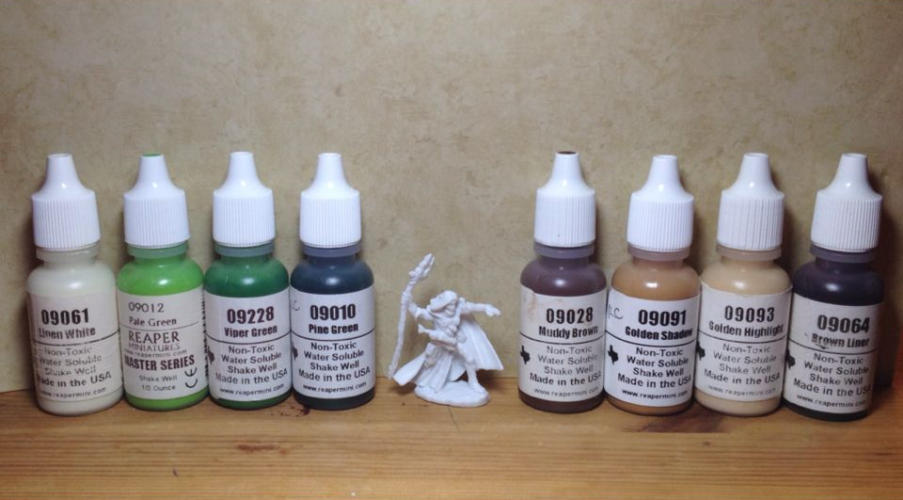
After the preliminary dance of cleaning, assembling & priming, I made some significant progress. I wanted to paint her in more Earth-based/camouflage colors and give her clothing a sandblasted look to them. So far so good!

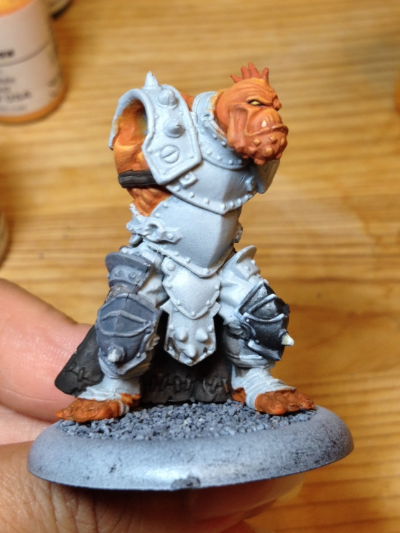
My biggest challenge here is to avoid obsessively blending my colors. I want her pants to look like well-worn twill-- a sturdy fabric that has faded over time. I'm not quite there yet, but I'm getting closer. Right now, they look too clean so I'll probably mute the highlights with some subtle glazes. I'll see how the rest of the miniature turns out before I go back & fuss over the pants. Here's a WIP picture after I painted the front of the pant fabric:

Speed Paint Challenge · The Process

Happy Miniature Monday! As you may know, last week I invited a fellow miniature painter to join me in a Speed Paint Challenge. I cataloged each step of the process so I could share it here! First, my painting setup:

Clean brush & mounted mini? Check. Chilean wine? Check. Wet palette & water cup? Check. I'm ready to go! (Though I don't recommend placing your beverage of choice too so close to your paint water... for obvious reasons).

The Color Palette

Color Limit: 6 Earth Tones, 2 Neutrals [+1 Metallic if needed]. My choices from the Reaper paint line:

  • Neutrals: Linen White, Brown Liner
  • Greens: Pale Green, Viper Green, Pine Green
  • Browns: Muddy Brown, Golden Shadow, Golden Highlight

In retrospect, I could have chosen a wider color palette. However, I kept the green shades close together in order to make mixing easier and therefore streamline the layering process on the cloak. 

Time Limit: 4 hours

I chose to paint in 30 minute increments over the course of two nights. To make sure I didn't lose track of time, I'd set a timer on my phone. When the alarm went off, I would put my brush down & take a short break. In that time, I'd decide what to paint next & make sure I was still managing my time wisely-- a great habit I'm trying to create for myself.

Step-by-Step Front


Step-by-Step Back


The Results

The staff was a happy accident. Since Bones are made of plastic, sometimes they get warped and bent. It's an easy fix to soak them in hot water and reposition them while they cool. However, I figured I'd work with the bent staff as-is and paint it as if it were a living, magical vine. I'm also happy with how his eyes turned out-- I painted just enough detail where he has delineated green irises but no pupils. 

As I neared the end of the last timed segments, I focused on small highlights and minor details. With two minutes left, I realized I had entirely forgotten to paint his base-- whoops! I was only able to put a thin base coat down before the timer went off. Once it dried, I refrained from going back to paint another layer. I stayed true to the time limit. It was a good lesson to learn-- that's what makes it a fun challenge!

Shaded Metallics

Last week I started the Troll Axer and wanted to learn more about Shaded Metallics. I did some research and here's what I found:

From what I gathered, Shaded Metallics (a.k.a. "TMM: True Metallic Metal") is a method in which one paints shades of metallic-based paints to mimic metal surfaces. (I know that sounds like the lamest definition ever but bear with me). Instead of painting a section of a mini with a few coats of the same color of metallic paint and moving on, the idea of Shaded Metallics takes it a step further. In this case, you would limit the reflection of the metallic base coat with a darker, non-metallic paint. After learning that in my research, my first thought was, "Why in the world would you undo what you just painted in in the first place?".

To my understanding, metallic paint, when applied to such small surfaces, is too unpredictable and doesn't allow for a realistic look. I found one of my miniatures that was painted with simple metallic paint and tried rotating it around under a light source-- I saw lots of reflections in both the highlighted parts and the parts that should be in partial shadow. In this case, the painter has no control over the metallic paint and it can completely derail your attempt at painting a fixed lighted source, an overall dark tone/color scheme, or can simply be too bright and distracting to the viewer (Ooh, shiny!). Just think of the new pewter mini you take out of the original package-- it's hard to make out all the details since the light reflections distort some of the shapes and obscure your ability to see each surface clearly. Once you prime the mini and neutralize the shininess (and especially if you do a quick dark wash) the details become much easier to see. 

In the past, I've tried to cut down on the metallic paint with washes of Pure Black (which I now rarely use), and I ended up with a muddy result-- Captain Dish Rag being a prime example:


"Captain Dish Rag" painted Spring 2013

Shaded Metallics isn't just about toning down the metallic paint, it's also about bringing it up with highlights. Instead of using one metallic paint in this instance, one would use two or more-- one for the base coat and a lighter metallic color for the highlights. 

Shaded Metallic Test #1: Layering 

With Troll Axer, I followed the layering technique on the right knee armor section (step-by-step below) 

  1. Painted two thin coats of metallic paint and then started shading with thin, super-dark-blue glazes. I made sure to blend the border of the matte glaze where it met the metallic base coat.
  2. Added a lighter metallic of "Polished Silver" on the upper parts of the pointed sections to show that it would reflect more light than the lower portions.
  3. Added near-white highlights on "hot spots" where I thought the most light would be reflected-- mostly in corners and top lip sections of the armor panels. This took awhile and I'm not sure if I even got the look right.

Honestly, I feel like I could have done NMM (Non-Metallic Metal) in that time it took to layer smoothly. Since it was my first time, I'm sure I'd be faster at TMM in the future, but I decided to try another idea to round out my TMM study...

Shaded Metallic Test #2: Washing 

Using a wash of Citadel "Nuln Oil" Shade over the metallic base coat

I purchased this on Amazon a few weeks ago after reading about Citadel "Shade" paints:

Citadel Shades are specially formulated to flow over other paints and into the recesses on your miniatures, defining details and accentuating recesses. Once applied, they dry to provide very effective, matte shading for your models.
— http://www.games-workshop.com

It seemed pretty easy so I followed these two steps:

  1. I painted the same thin coats of the base metallic paint on the left knee
  2. Used a wash of Citadel Nuln Oil

Before I started the first round of highlights, I decided to open a bottle of Malbec and pour myself a glass while I waited for it to dry. When I returned, I gave a surprised "What the... that can't be right!". After I had spent all that time layering his other knee armor section, the wash seemed to have mimicked the look in a fraction of the time. I didn't believe it, so I painted the base metallic coat on the rest of his upper torso & shoulder armor, let it dry and applied a wash of Nuln Oil over that. I realized it wasn't just dumb luck and admitted to myself, "Oook, that's stupid-easy".

After that, I did some shading on his mid-section with that matte-dark blue from Test #1 and realized the combination of layering glazes and shade washes will yield the best results. Test #2 isn't as controlled and as clean as the #1 layering technique, but I think it pays off in efficiency. While the Nuln Oil/combo sections aren't yet highlighted, you can see how I skipped a few layering steps when comparing one knee to the other:

I know that as I continue, I'll probably use a mix of these two techniques on this miniature and see what results I can achieve as I paint over this weekend. I know there's much more for me to learn with the Shaded Metallic techniques and many happy accidents for me to discover. Overall, I think I'm off to a good start. See you next Miniature Monday!